hearandknow

Archive for August, 2013|Monthly archive page

Routing NI Maschine into Ableton

In daw, drums, instrument, ni maschine on August 4, 2013 at 16:37

After discussing NI Maschine’s output routing in my post NI Maschine’s (output) routing, we able to map Maschine’s output to different Ableton channels. Let’s see what’s our plan.

Routing each group into different channels.

So, we will rout each Maschine group into a different Ableton channel. Unfortunately there is no automation for this step. You have to select each Maschine group output and choose a different output. I think, you shouldn’t use Out 1, because it’s something like Maschine’s Master channel, but I’m not sure.

Select a different output

When this is done for all groups, you can create new channels in Ableton Live. Each channel get its audio from NI Maschine’s (output) routing and one of its outputs. Don’t forget to choose Monitor in, otherwise you will hear nothing. I think, it’s a good idea to save this settings to a song, so you haven’t to do this in Ableton again. Where there is light, there is also shadow. I shall not hide that you have to map every group to different Maschine outputs for every of your existing projects.

Getting audio from different outputs

That’s all for today. Best regards!

alexander

NI Maschine’s (output) routing

In daw, drums, instrument, ni maschine on August 4, 2013 at 15:36

Hello! Yes, I’m back. Today I would like to tell you something about NI Maschine’s default output routing. I was stumbling over this subject while routing every group to a different output channel in Ableton Live. This will be the second part of this series. But everything at its time and on its place.

Maschine's default output routing

This diagram contains the three relevant types. Maschine’s sixteen output channels (green) and the groups (brown) including their sounds (blue). Maschine’s default will route everything to the ‘out 1’ output channel.

Select one of the groups

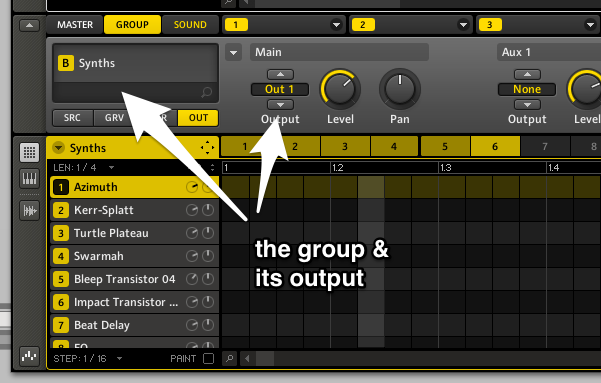
You can select one group by clicking one block in the upper left area of Maschine’s interface – for example B Synths. The middle section contains the corresponding tabs Master, Group, Sound. Don’t forget that the Master tab is effective for every group and sound. As you can see (default) every sound is routed to its group.

Each group is routed to out 1

This picture shows that every group (per default) is routed to the output channel Out 1.

Different types of sounds.

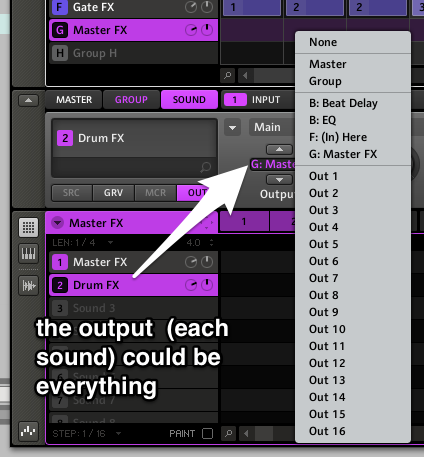
Actually you can rout every group and sound to everything. Here is an example, how to implement an effect channel.

There are different types of sounds. The normal type is Sampler, but if you choose Input, you can rout the output of everything to this sound, but the Input can not root its output to the Input itself. You can add some effects to this sound, in order to get a common effect channel for some sounds. Yes, I think the label sound in that case is misleading. Anyway… in this example the output name is Drum FX with the letter of the group G.

This channel is available for every sound

This channel is available for every  group

Finally as you can see in the last two pictures, those effect channels are available for every sound and group. I know, these concepts and naming are a bit confusing, but from now on, we can use rout every output to a different channel in Ableton Live. And – of course – there is more stuff for creative routing in NI Maschine. The first one will be shown in the next post.

Best regards!

alexander